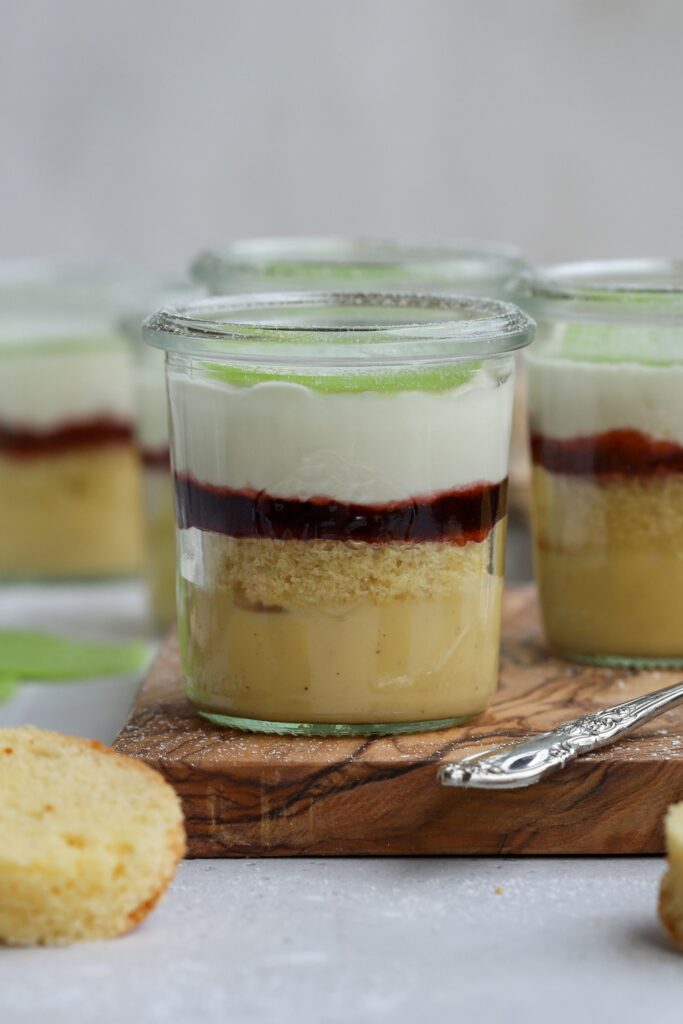
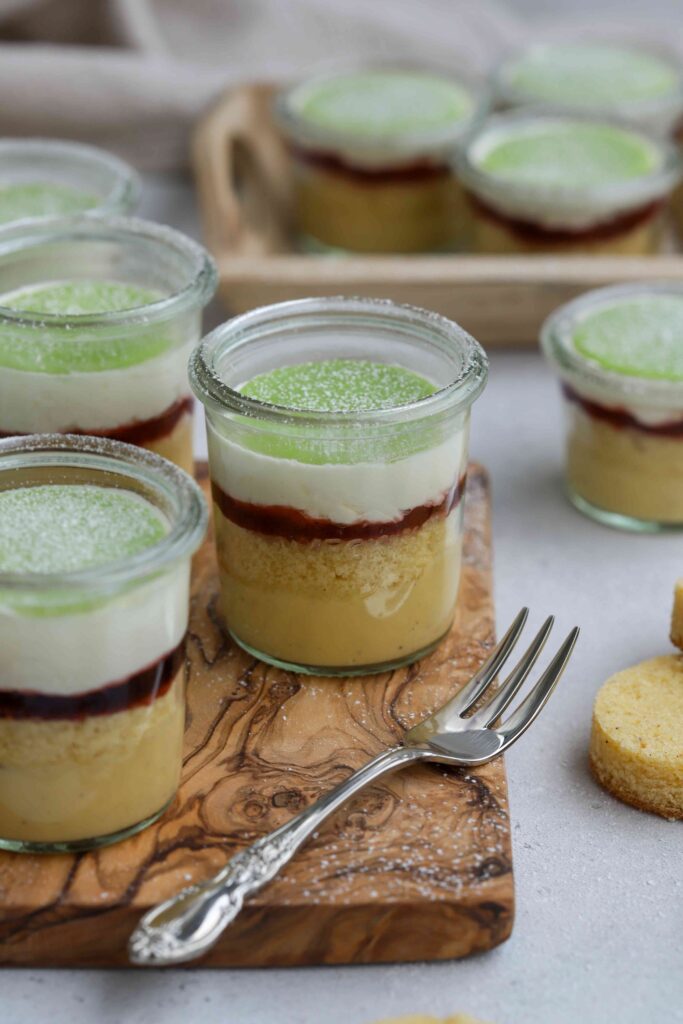
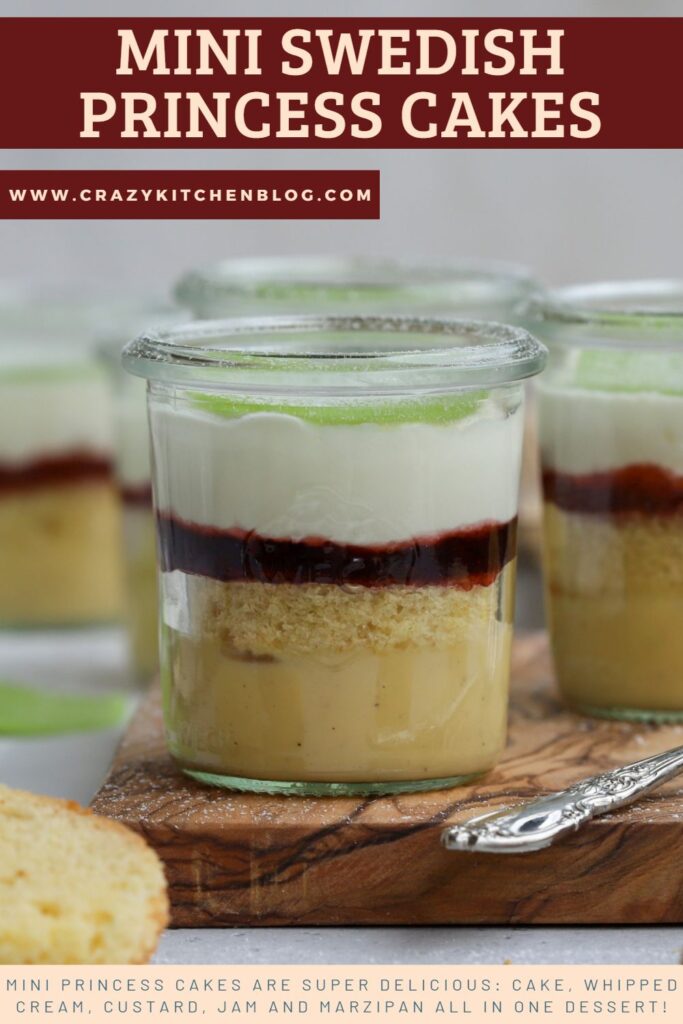
These Mini Swedish Princess Cakes in a jar are perfect for any occasion. Light and airy sponge cake, vanilla custard, sweet and sour berry jam, fluffy whipped cream, and a thin layer of marzipan make these cakes in a jar an indulgent, delicious treat. Mini Princess Cakes are a little bit time-consuming to make, but the stunning result at the end is absolutely worth it. You’ll feel like a princess or prince when eating these little treats in a jar!
A quick side-note: I have been getting a huge amount of visitors for this particular blog post, but my website analytics isn’t telling me where these readers are coming from. If you have a moment, please leave me a comment or shoot me an email telling me where you discovered this recipe – I would love to know if I/my recipe got featured somewhere!
Why I love Swedish Princess Cake
The classic Swedish Princess Cake is one of my all-time favourite cakes (just like the Tiroler Cake, an Austrian Chocolate Hazelnut Cake, that I published a few weeks ago). I absolutely adore the combination of vanilla custard, whipped cream, cake, and marzipan!
The cake is very indulgent, actually, but since practically all the layers are somewhat light and fluffy, one doesn’t realize how filling the cake actually is. I don’t eat Swedish Princess Cake that often though, so the once-in-a-while-treat is perfectly acceptable. 🙂
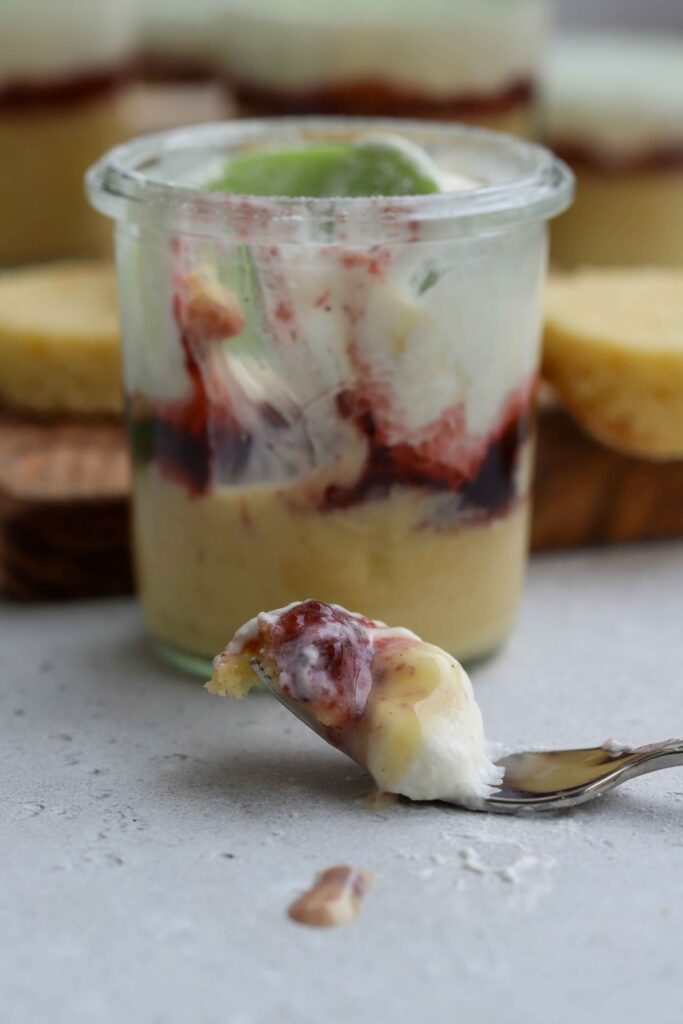
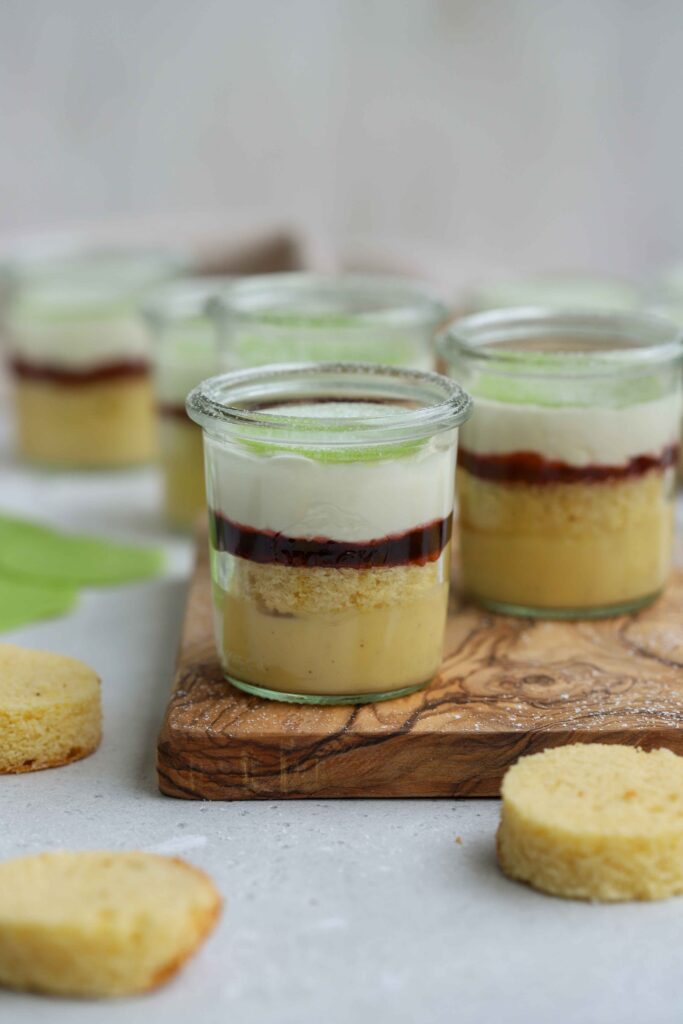
The layers are really the best part of the Swedish Princess Cake. It’s a true flavour and texture explosion when taking your first bite. And, of course, the signature light green marzipan on top makes this cake a true dessert buffet staple.
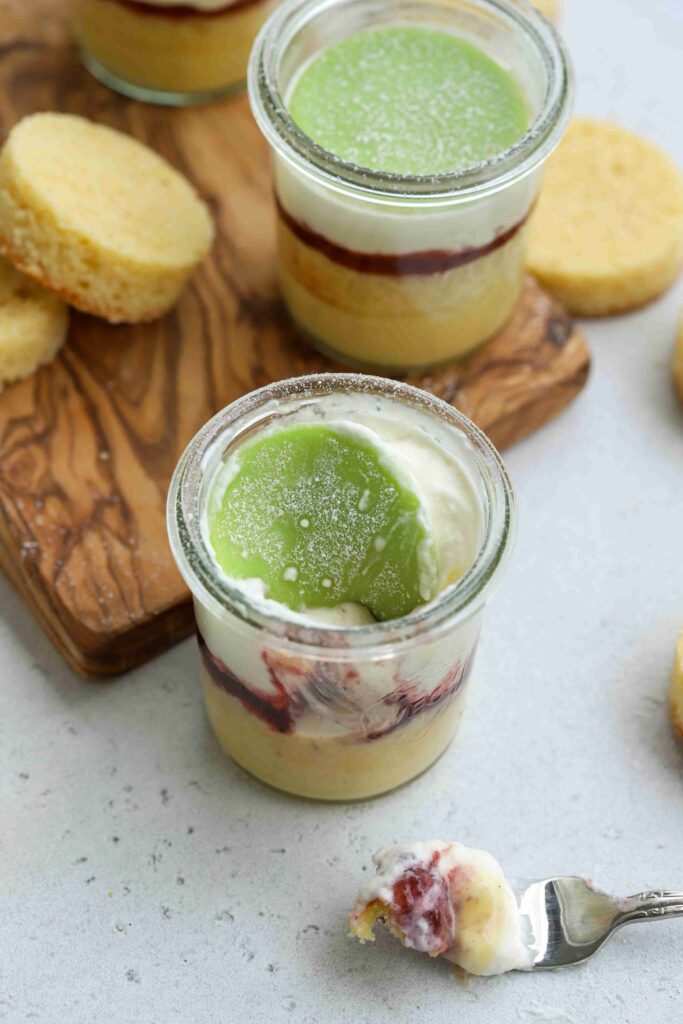
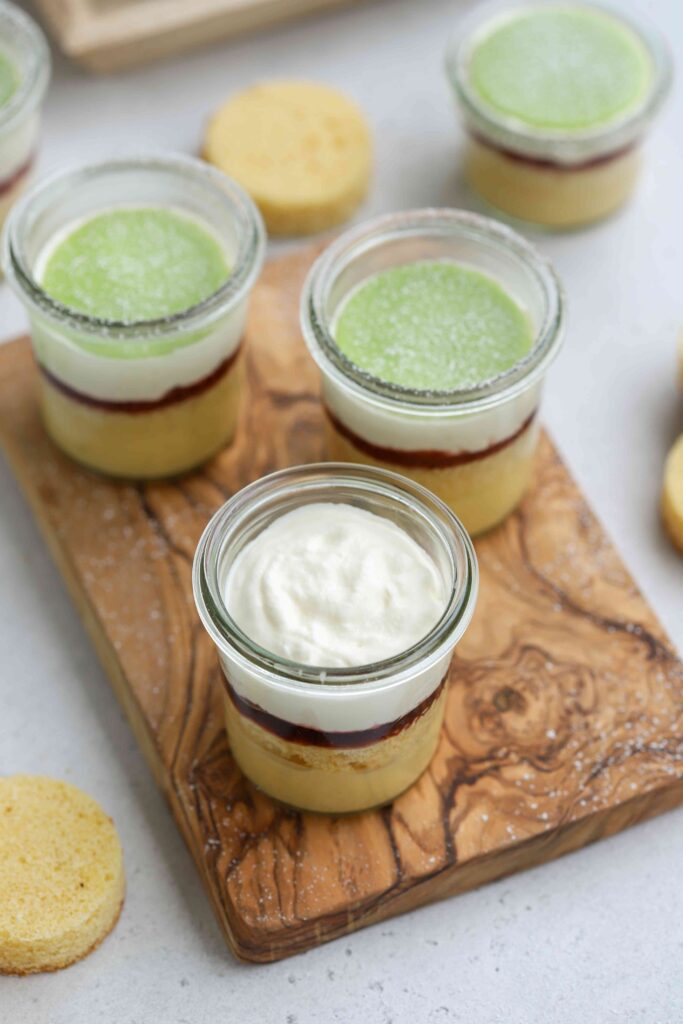
The cake itself is a bit time-consuming to make though, so I decided to turn the original cake into easier miniature versions. In my opinion, the big original cake can be a bit hard to put together, so I didn’t want all the fuss, either. To make these Mini Princess Cakes, all you need is some small, pretty glass jars, like these from Weck, a round cookie cutter, and a tiny bit of patience. That’s it!
Fortunately, a lot of the components/layers can be made 1-3 days ahead, which is a plus in my book, too!
The Mini Swedish Princess Cakes I am showing you today are not 100% accurate to the original recipe. I’ve added a few twists and made some small changes. If you want to make the traditional “big” cake, I strongly encourage you to find a delicious sounding recipe on a blog of your choice, and not using the recipe I am providing you with.
For instance, I use more jam than the traditional cake calls for, and I also opt for a delicious vanilla pastry cream (vanilla custard).
What are the ingredients for Mini Princess Cakes?
Even though the preparation for these little desserts is a bit time-consuming and a bit more “hands-on” than my usual recipes, the ingredients are simple, and I am sure you’ll have most of them in your pantry already. What’s more, many of the layers can be made ahead of time, and even the “final” desserts can be made in advance and kept in the fridge.
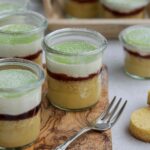
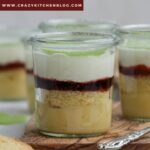
Depending on which Swedish recipe you look up, some call for jam in the layer cake, and others don’t. I personally love the sweet-sour tang, so I wouldn’t omit it. As you can see in my photos, my jam layer is a good 5 mm thick, if not more (about ¼ inch). If you aren’t a fan of a lot of jam in your desserts, just slightly warm it in a microwave (in a heat-proof bowl) so it gets a bit runnier and more spreadable, and brush on a very thin layer of jam on the cake, just to keep the cake moist.
Ingredients for the Cake
For the cake, you only need seven ingredients. You definitely need butter, caster sugar, eggs, flour and baking powder. I also recommend using some salt and vanilla, just to give the cake a bit of flavour.
The recipe is very easy, so just follow the instructions in the down below!
The cake can be made 1-2 days in advance. Just be sure to wrap the whole cake in plastic wrap or aluminium foil, and to place it in the fridge. You could also cut the cooled cake into layers already and refrigerate the layers until ready to use. Read the recipe notes for tips on storing the baked cake.
Ingredients for the Vanilla Pastry Cream
The vanilla pastry cream is quite easy to make and is very (very!) delicious. All you need is some milk, 6 egg yolks, caster sugar, vanilla, corn starch, a bit of salt and some butter.
You can make the vanilla pastry cream up to 3 days in advance, and leave in the fridge until ready to use.
A short note on the vanilla: Normally, custards and pastry creams call for a whole vanilla bean. Because the pastry cream isn’t the main star of the show in this dessert, I wouldn’t spend that extra money, because vanilla can be quite expensive. One tablespoon of vanilla paste, extract or ground vanilla will taste absolutely fine, too.
What to do with extra egg whites
I know that 6 egg whites are quite the amount of egg whites 🙂 To use them up, I suggest making a batch of meringue. That way, if you have any vanilla pastry cream left or also whipped cream, you have a second dessert. If you like, you could even crumble up some of the meringue and sprinkle some in between the layers in the jar for some extra crunch!
Here are some other recipe ideas using only egg whites:
- Rhubarb Cake with Hazelnut Meringue
- French Macarons
- Tiramisu
- Pavlova (a meringue cake)
- Lemon Meringue Pie
- Macaroons
- Mousses
Ingredients for the Whipped Cream
The whipped cream only uses two ingredients: Powdered sugar and whipping cream (also known as double cream, heavy cream). If you like, you can add some vanilla, but I prefer to go without.
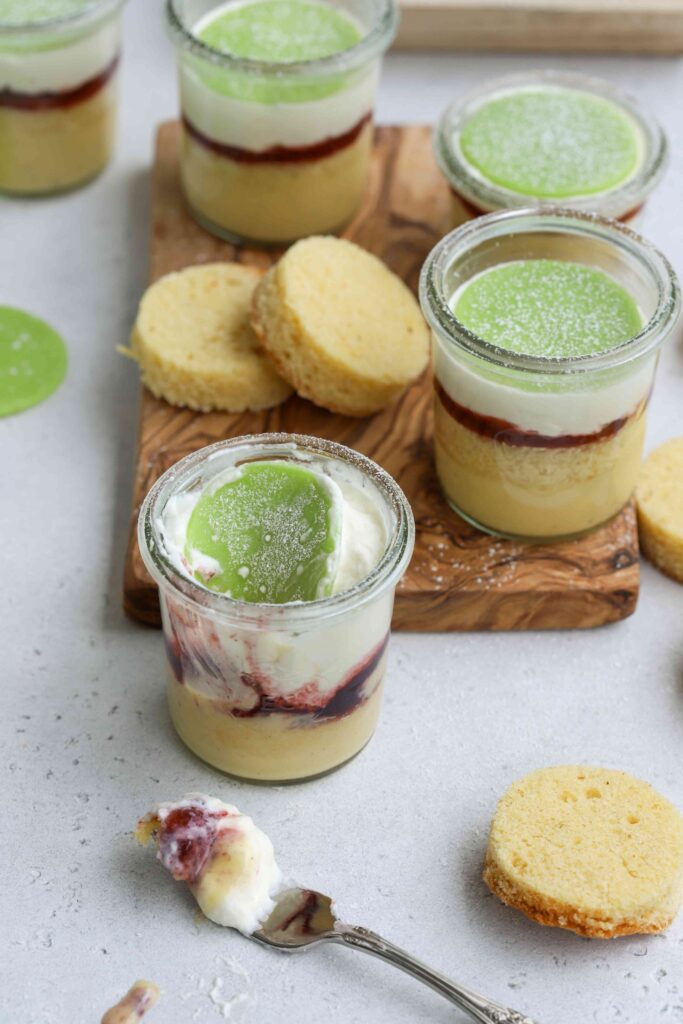
How to Make Mini Swedish Princess Cakes
Making the Mini Princess Cakes is a really relaxing process. It does take a bit of time, so be sure to plan ahead. As I mentioned already, a lot of the components/layers can be made a few days in advance, so if you have a tough time schedule, do prepare some of the layers beforehand.
Step 1: The Vanilla Pastry Cream
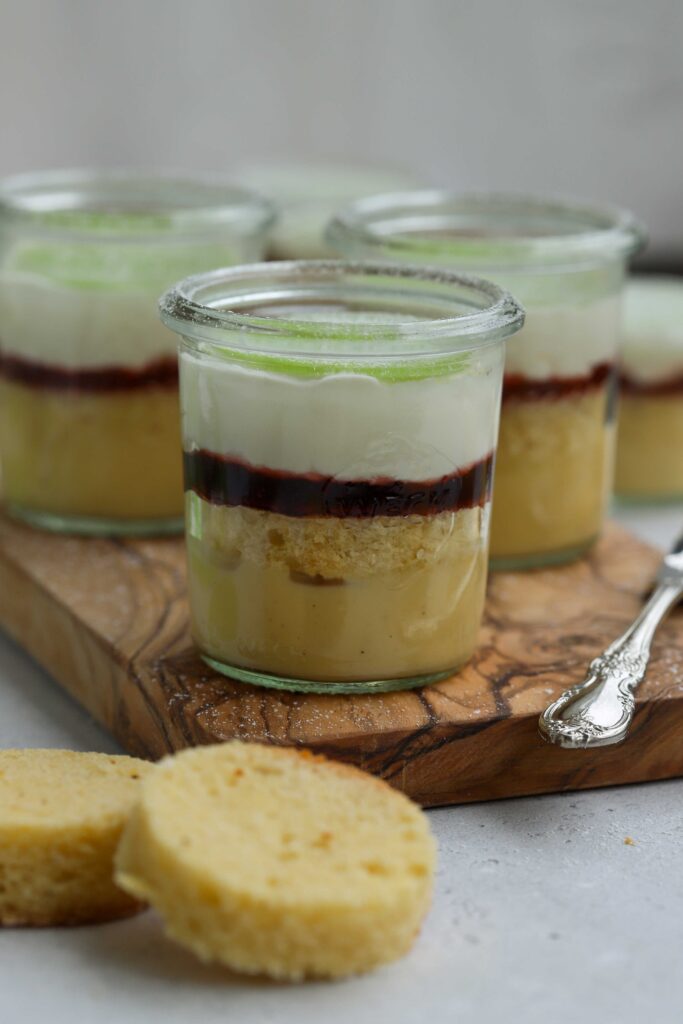
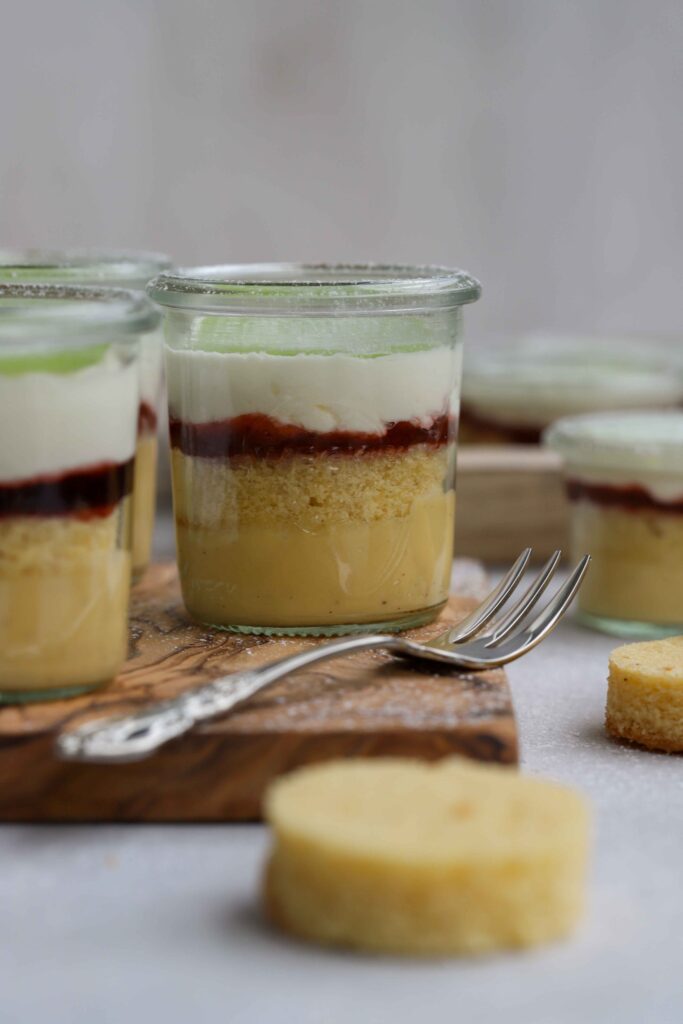
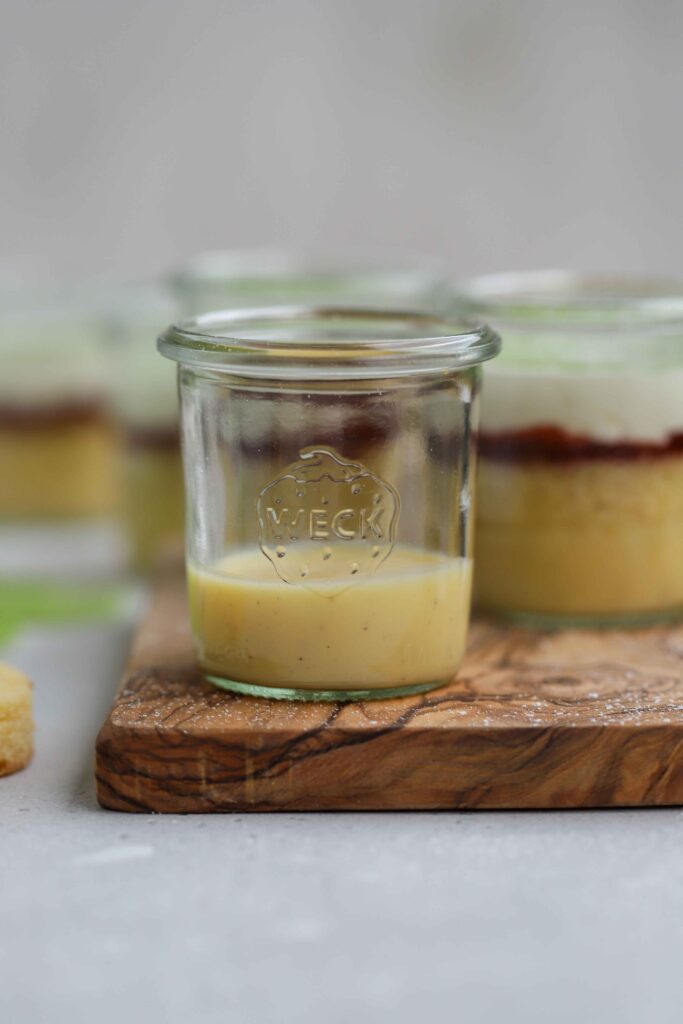
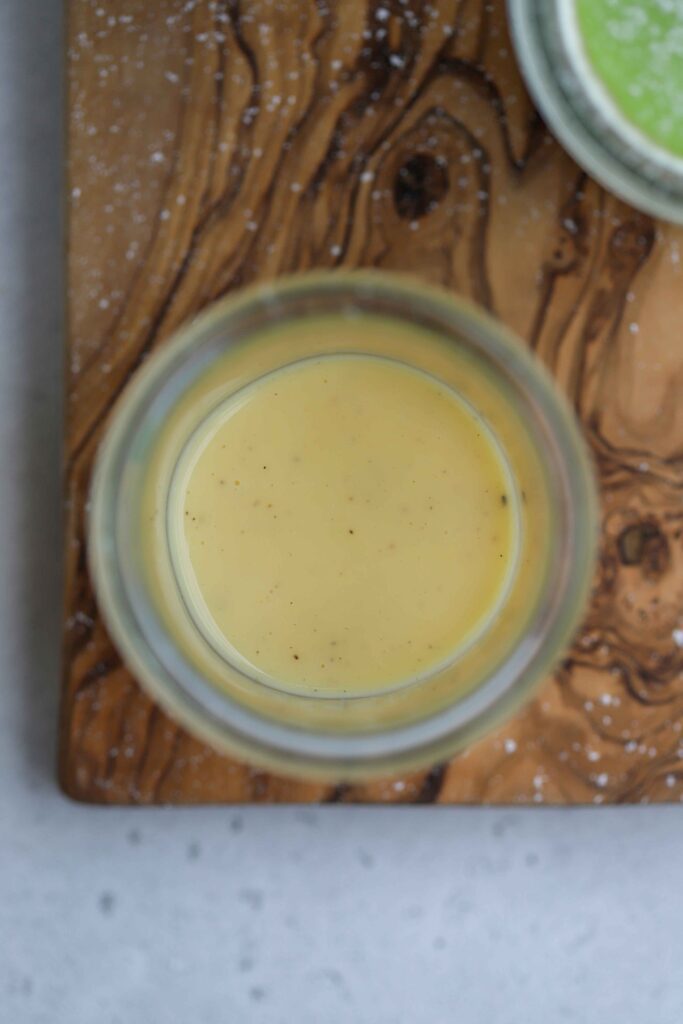
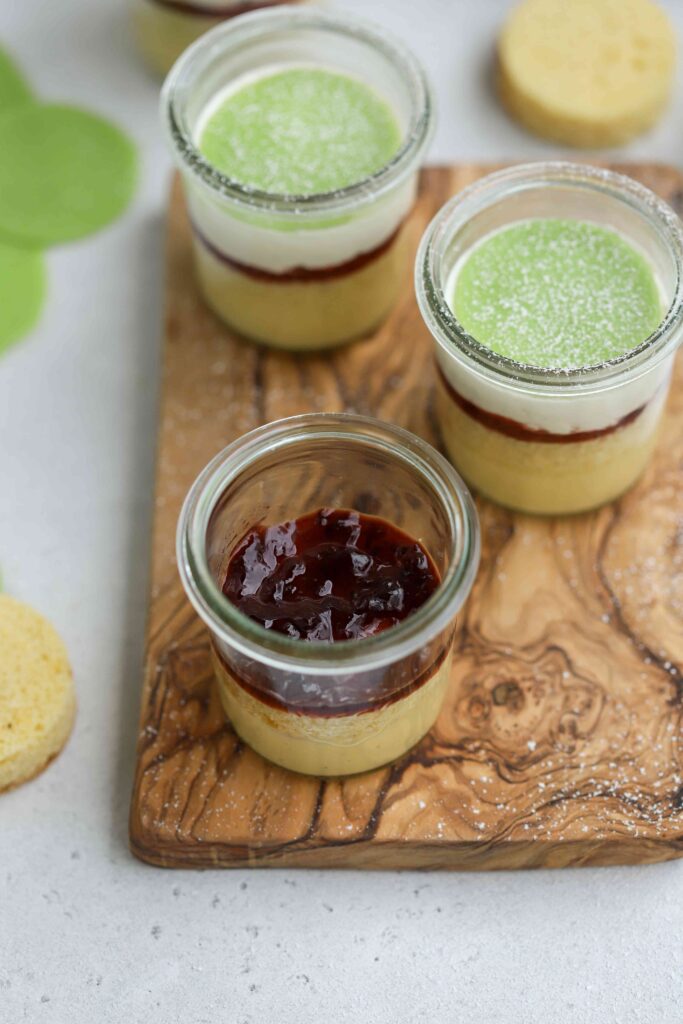
Begin by pouring the fully cooled vanilla pastry cream into your jars. I suggest using glass jars and not ceramic ramekins, for the simple reason that the dessert is a lot more attractive when all the different layers are visible. But if you don’t have glasses, ceramic ramekins will do the trick, too!
Step 2: The Cake
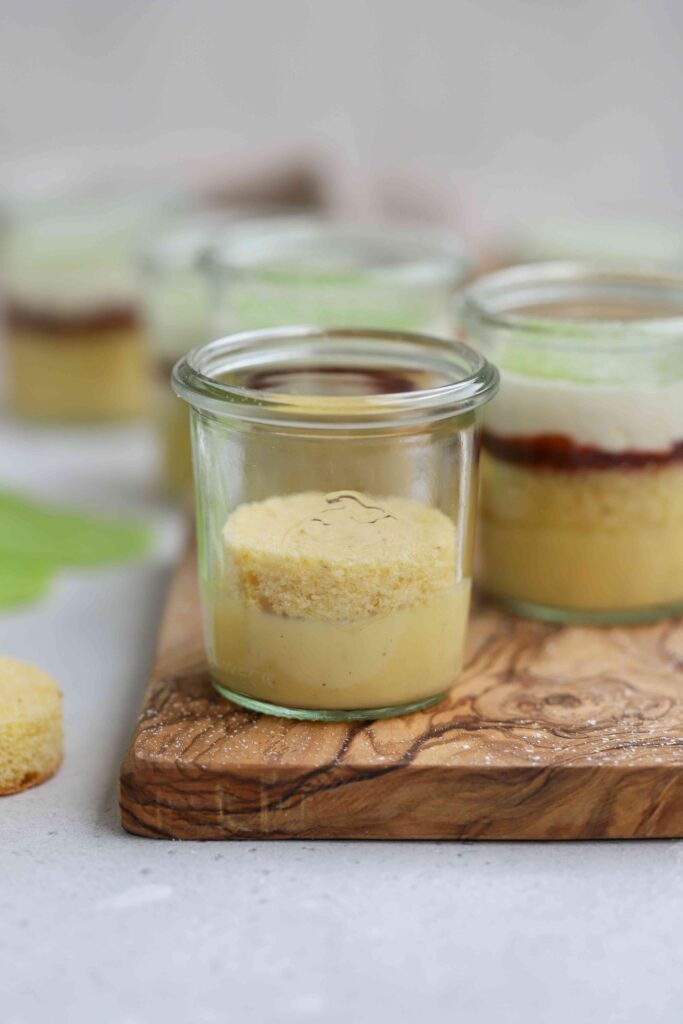
First, begin by cutting your cooled cake into layers. A layer should be around 1-1.5 cm thick (about ½ inch). Alternatively, you can prepare the layers and then refrigerate until ready to assemble.
Using a cookie cutter or a glass the size of your serving jars, cut out little cake circles and carefully lay on top of the vanilla pastry cream. Be careful not to press the cake down too far.
Step 3: The Jam
Next, you dollop 2-3 tablespoons of jam directly onto the cake. I love how sweet-sour, tarter berry jams pair with all the other layers: For instance, use a raspberry jam, a sour strawberry jam or red currant jam. If you don’t love jam, simple warm some jam in a heat proof bowl in a microwave and brush it directly on top of the cake. This extremely thin layer gives the cake a little bit of flavour and keeps it moist.
Step 4: The Whipped Cream
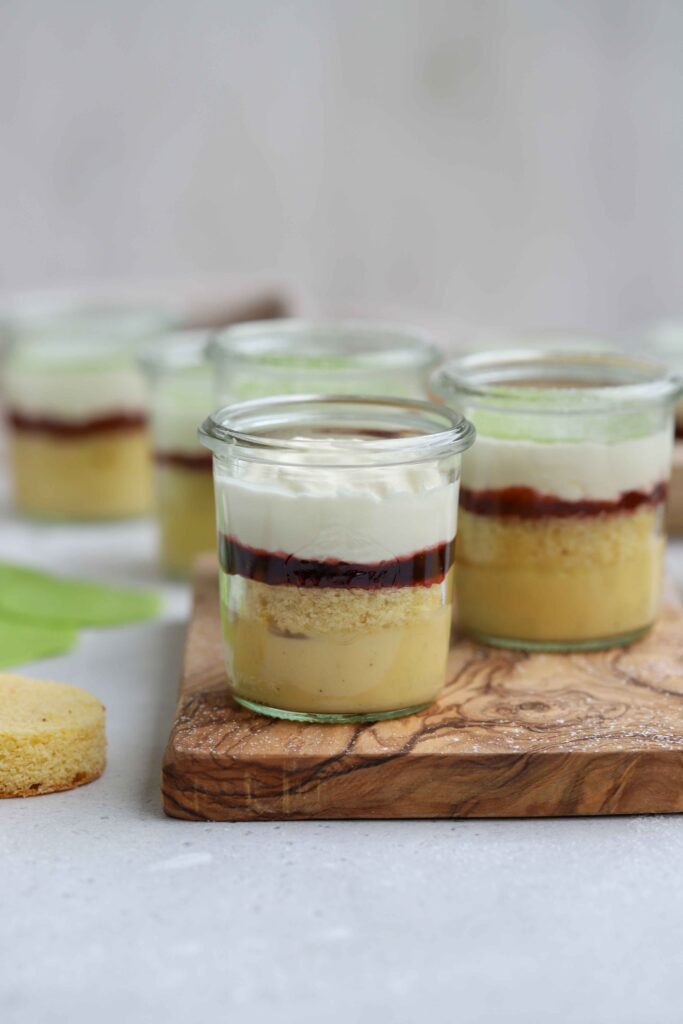
The second last layer is the heavenly, fluffy whipped cream. Depending on the height of your jars, you can add more or less whipped cream. I find it easiest to add the whipped cream with a spoon, and then using a small spatula to spread it. If you need to, clean the glass with a paper towel.
Alternatively, if your whipped cream is on the stiff side, put the whipped cream in a piping bag and pipe on top.
Step 5: The Marzipan
It’s time for the final layer: The marzipan! If you don’t like marzipan, you can of course omit it, but I strongly advise you to include it in the recipe, as it’s what the traditional Swedish Princess Cake recipe calls for. And it’s sooooo delicious!
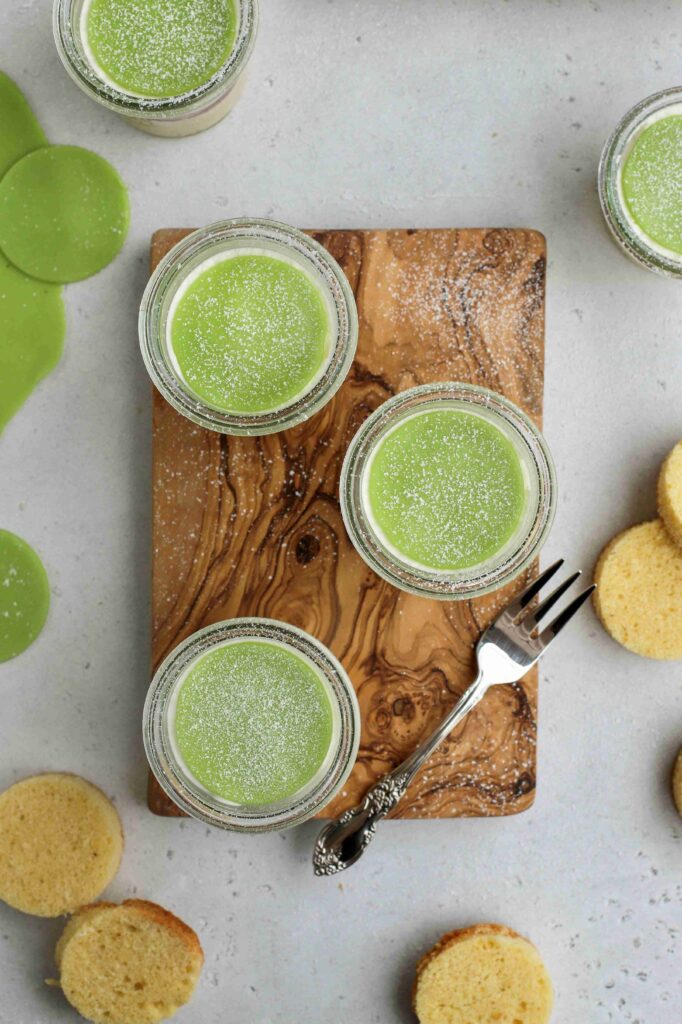
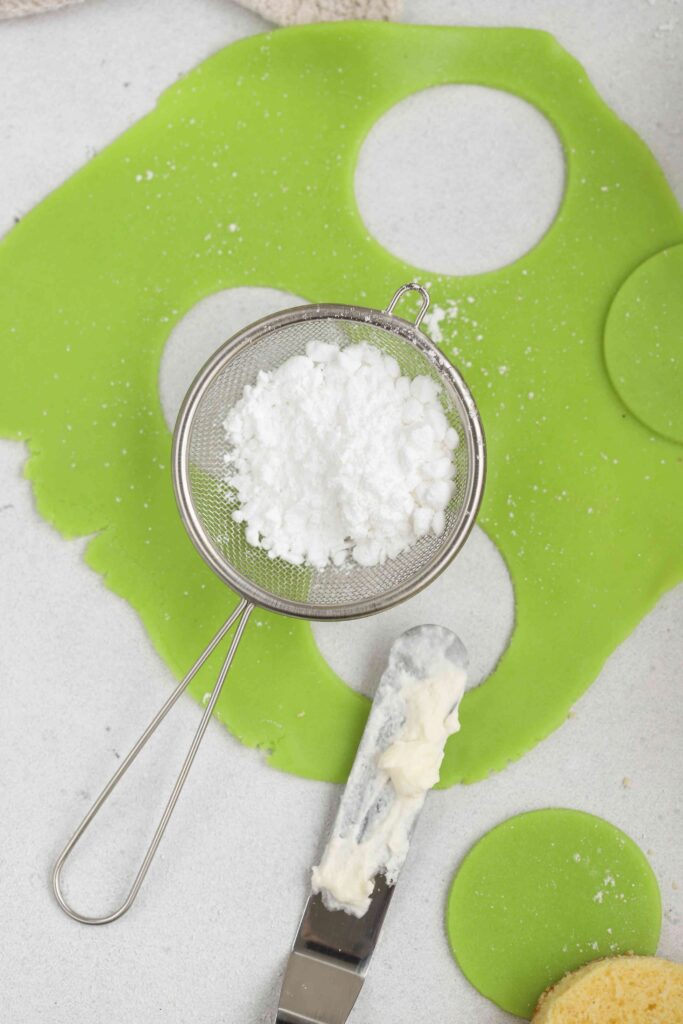
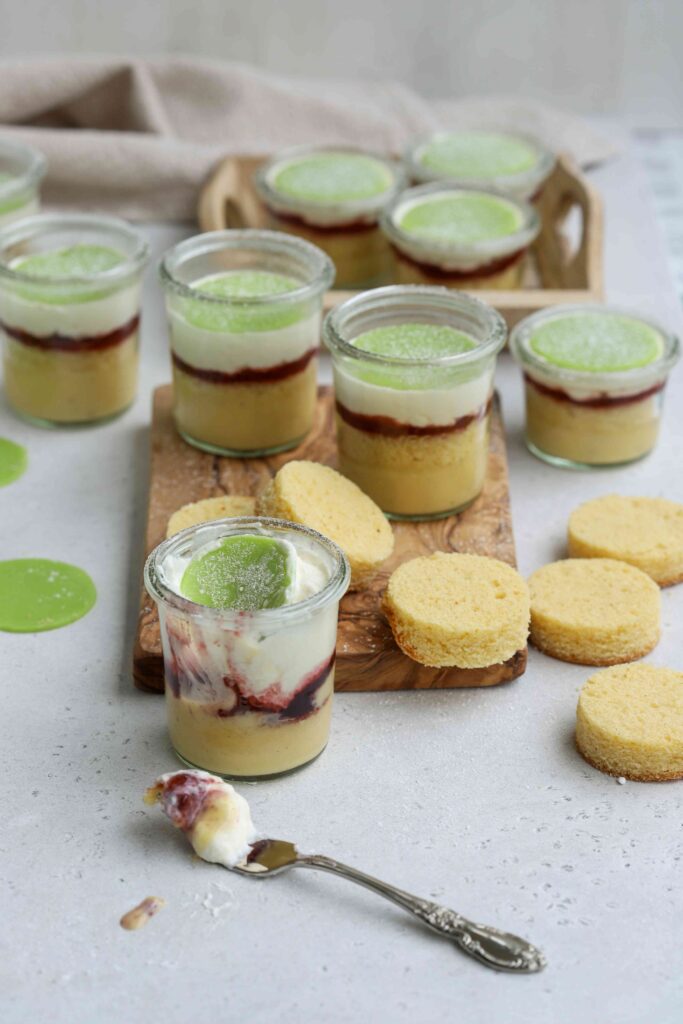
Roll out the marzipan between two sheets of plastic wrap. It helps to sprinkle a little bit of powdered sugar on the plastic wrap. Roll the marzipan about 1 mm thick. Then use a round cookie cutter or glass, cut out the marzipan, and place it on top. Finish the dessert by sprinkling on a tiny bit of powdered sugar.
Green marzipan is the traditional marzipan colour, but you can use any colour you like. (It is suggested that pink marzipan is used for a raspberry jam filling, and then the cake’s name would be Operatårta. The Prinstårta is made with yellow instead of green marzipan).
My memories of eating the Green Marzipan Cake
When I was younger, I referred to the Princess Cake as “Froggy Cake”: Because Frogs were supposedly green, it made sense that this extravagant dessert covered with green marzipan was also somewhat related to frogs. Hence “Froggy Cake”. 😉
I remember several occasions where my Grandpa and I shared a slice of Princess Cake. There was a huge shopping centre near us, and whilst my mom went shopping, he would eat an afternoon snack with me and keep me entertained until mum was finished.
For whatever reason, I strongly remember that snack always being a slice or two of Princess Cake. It’s quite possible that we didn’t even share though, because I loved the cake very much – and so did he! He loves any dessert with custard in/on it. Little did I know that years later, I would be publishing my own recipe for miniature versions of our favourite dessert.
Where does the Princess Cake come from?
Originally, the Princess Cake comes from Sweden. The Princess Cake is also known as Swedish Princess Cake or Prinsesstårta.
It first appeared in a cookbook by Jenny Akerstrom, called Prinsessornas Kokbok. She was the teacher of Prince Carl’s three daughters. The original name for this cake was Grön Tårta. So, I wasn’t even that far off with my frog-related ideas. Apparently, the three princesses loved the cake so much, that later the cake was named after them!
Variations
If you like, you can buy pre-made vanilla cream or vanilla custard. The same goes for the whipped cream and the cake: If you like, simply buy already baked cake layers and cut out the circles; and use whipped cream in a can/spray.
I am sure you will love these Mini Swedish Princess Cakes as much as I do. The Princess Cake recipe might be a bit time-consuming, but the effort is absolutely worth it. No need to travel to IKEA anymore to get a hold of that classic Swedish marzipan cake;)
If you try the Mini Princess Cakes, be sure to write a comment and rate the recipe, and don’t forget to tag me on Instagram!
Take care,
Joelle
You might also like
- My Mini Black Forest Cakes in a jar are a true favourite. These mini versions of the “real” thing are sooooo cute and just as tasty!
- If you’re in need of another indulgent, creamy dessert, you will definitely love my Crème Brûlée with sparkling wine. It’s easier than it sounds, and everyone loves it!
Mini Swedish Princess Cakes
- Prep Time: 2 hours
- Bake Time: 50 minutes
- Total Time: 3 hours
- Yield: 10 jars 1x
- Category: Cake
- Method: Baking
- Cuisine: Swedish
Description
These Mini Swedish Princess Cakes are so delicious! Light and airy sponge cake, vanilla custard, berry jam, fluffy whipped cream, and a layer of marzipan make these cakes in a jar an indulgent treat. Mini Princess Cakes a little bit time-consuming to make, but the stunning result at the end is absolutely worth it.
Ingredients
Cake
- 150 g butter
- 150 g caster sugar
- 3 eggs
- 1 tsp baking powder
- 1 pinch salt
- ½ tsp vanilla
- 150 g flour
Vanilla Pastry Cream (Custard)
- 500 ml (whole) milk
- 1 tbsp vanilla paste/extract/sugar (optional)
- 6 egg yolks
- 1 pinch of salt
- 80 g caster sugar
- 30 g corn starch
- 50 g butter
Whipped Cream
- 350–400 ml whipping cream
- 40 g powdered sugar
Assembly
- Berry jam
- 80 g (green) marzipan
Instructions
Cake
- Preheat oven to 160°C fan-assisted (180°C non-fan-assisted). Butter and line an 18 cm round cake pan.
- Cream butter, sugar, vanilla and salt for 2-4 minutes on medium speed until light and fluffy.
- Cream in the eggs one by one. Stir until just combined, and scrape down the edges.
- Sift the flour and baking powder into the mixture. Stir on low speed until just combined. Scraped down the edges and fold the batter a few times with a rubber spatula to incorporate some more air.
- Pour the batter into the prepared pan, and bake for 40-55 minutes, until the cake is golden-brown, and a toothpick inserted comes out clean.
- Let cool for five minutes in the pan, then take the cake out and place on a cooling rack. Leave to cool for at least an hour at room temperature and then place the cake in the fridge, possibly overnight.
- When fully cooled, cut the dome of the cake off. Depending on the height of your cake, slice the cake into 2-4 cake layers. A layer should be about 1 to 1.5 cm thick.
- Until ready to assemble, stack the cake layers and wrap in plastic foil.
Vanilla Pastry Cream (Custard)
- In a medium-sized pot, heat the milk over medium-high heat until. Add the vanilla and let milk heat until simmering and a few bubbles are showing.
- In the meantime, whisk together the egg yolks, sugar, corn starch in a bowl.
- When the milk is bubbling a little bit, take the pot off the stove. Whilst whisking the egg mixture, carefully pour in about half of the milk in a thin stream. It is very important to whisk the eggs at all times, otherwise, you risk cooking your egg yolks.
- When the egg mixture is tempered (has warmed slightly), pour it back into the remaining milk in the pot. Use a spatula to scrape the bowl clean, and whisk the mixture in the pot until fully combined.
- Place the pot back on the stove. Cook over medium-high heat, whisking continuously.
- It should take 2-3 minutes until the pastry cream starts to thicken. Let the custard come to a boil, and lower the heat to medium-low. Cook for another 1-2 minutes. And then take pot off the stove.
- Whisk in the butter, until no lumps remain.
- Pour the custard through a sieve into a bowl. Cover with plastic wrap – make sure to press the plastic wrap onto the surface of the custard, so no custard skin forms.
- Let cool in fridge until ready to serve (the pastry cream can be made up to two days in advance).
- When ready to use for the Mini Princess Cakes, take the bowl out of the fridge and give it a good whisk.
Whipped cream
- In a medium-sized bowl, mix the heavy whipping cream on medium-high speed until soft peaks form.
- Sift in the powdered sugar (optional), and stir further on medium speed until stiff peaks form.
Assembly
- Using a small round cookie cutter (or a glass), cut out little cake circles the size of your glass. Set aside.
- Roll out the marzipan between two sheets of plastic foil to about 1-2 mm thickness. Using a round cookie cutter, cut out small circles and set them aside.
- For the first layer of your Mini Swedish Princess Cakes, pour the vanilla pastry cream into the glasses until about 1 cm high (about ½ inch). Depending on the size of your glass, the pastry cream layer can be higher!
- Next, carefully place a cake circle on top. Be careful not to press the cake down too far.
- Place about 1-2 teaspoons of jam on top of the cake and spread carefully.
- Next, dollop 2-3 tablespoons of whipped cream on top of the jam and spread.
- Finally, place a marzipan round on top and dust lightly with powdered sugar. Depending on the size of your glasses, repeat with more layers, finishing off with a layer of marzipan.
- Leave the glasses/jars in the fridge until about 30 minutes before serving, then leave them at room temperature. Enjoy!
Notes
- Depending on the size of your cake pan (18-22 cm works best), your cake won’t be as tall as mine. Thus, you will only need to slice your cake 1-2 times (resulting in only 2-3 layers).
- Also, depending on the size of your glasses/jars, you can repeat the layering process until the jar is filled. Be sure to finish with the signature marzipan layer!
- For the jam, I suggest using a sweet-sour berry jam (like strawberry, raspberry, blackberry, or mixed berries). The other components of the dessert are quite sweet already, so a tart berry jam layer in between is a fantastic idea!
- This dessert can be prepared the day before. Leave in fridge until ready to eat, and take out 30 minutes before eating.
- Instead of making your own cake, vanilla pastry cream and whipped cream, just buy a ready-made vanilla cake and cut the layers (and mini cake circles) accordingly. You can buy vanilla pudding and use that to pour into your glasses, and you can do the same for the whipped cream.
In some stores, you can also buy baked cake layers, which would also do the trick!

These look adorable, and I would love to make them. What size jars did you use? The link you provided doesn’t go to a specific jar and the site is in German.
I love how these look and they sound delicious! Even though it isn’t traditional I wonder if lemon curd would be good as the bottom layer? Not sure if that would pair well with marzipan but I love lemon curd and marzipan.
Step 1 of the instruction for the pastry cream is an incomplete sentence. “In a medium-sized pot, heat the milk over medium-high heat until.” Until what???
There’s a bakery in Denver called Taste of Denmark which takes special orders.
My daughter’s BF, who grew up in California, asked for one of these for his birthday! He had a family friend in LA area whose family owns a bakery and they make them there, but we’ve been unable to find a local bakery in Texas panhandle that makes them. So, I went searching and found your post on Pinterest and I’m digging in today to make these cute little cups for his birthday tomorrow!
Dear Shonda,
what a lovely comment. I hope you enjoyed making and tasting these cute little cakes, they are truly divine!
Joelle xx
Is there anywhere that sells these?
Hi Mary,
unfortunately, I don’t live in the US and couldn’t tell you if these are sold anywhere. But they’re really easy, and many of the components can be store-bought, so I suggest you give them a try and make them yourself 🙂
Have a great day,
Joelle
IKEA sells them in their resturant
Not IKEA in FL, TX or NC.