Description
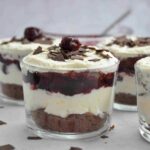
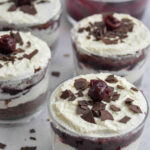
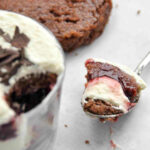
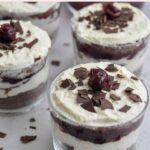
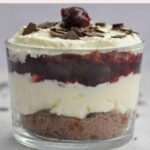
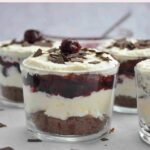
These cute mini Black Forest Cakes are the perfect dessert to satisfy that chocolate-cream-craving. Add some cherries and some Kirsch (or cherry juice), and you have yourself a dessert fit four your next gala-evening at home.
Ingredients
Scale
Chocolate Cake
- 135 g butter, melted
- 2 eggs
- 170g white sugar
- 1 tbsp vanilla extract or sugar
- 1 ½ tbsp cocoa powder
- 200 ml milk
- 200 g flour
- 1 ½ tsp baking powder
- 1 pinch salt
Simple Syrup
- 50 ml water
- 50 ml Kirsch or cherry juice
- 20 g white sugar
Whipped cream
- Approx. 500 ml full fat whipping cream
- 2 tsp powdered sugar, sifted
- Optional: cream stabilizer
Sour cherry filling
- 1 jar of sour cherries, about 650 g
- 15 g corn starch
- 1 ½ tsp lemon juice
- 1–3 pinches of cinnamon
- 30 g white sugar
Instructions
Chocolate Cake
- Preheat oven to 230°C/ 450°F (fan-assisted/convection). Line a large baking tray with baking paper and grease well. Make sure to leave some paper hanging over the edge, so you can lift the cake out after baking.
- Melt butter in the preheating oven in a small heat-proof dish.
- In the bowl of a stand-mixer, cream together the eggs, sugar, vanilla and melted butter until light and fluffy on medium-high speed.
- Whisk together all the dry ingredients. Add the first half of the dry ingredients into the butter-sugar-mixture. Mix well.
- Pour in all the milk whilst mixing on low speed – don’t worry if it begins to curdle, it will come together. Then add the remaining part of the dry ingredients, mix well and scrape down the edges of the bowl with a spatula.
- Pour into the prepared baking tray (see notes). Put the tray into the oven on the lowest rack and immediately turn down the temperature to 180°C (fan-assisted/convection). Bake for 12-15 minutes.
- Let cool in the tray for about 15 minutes, and then lift the parchment paper onto a cooling rack.
Sour cherry filling
- Whilst the cake is baking, make the sour cherry filling. Put a medium sized pot on the stove, and place a sieve over it. Then empty the jar of sour cherries into the sieve, and gently shake it around to drain the cherries. Carefully lift the sieve off the pot, and keep the cherries in the sieve, until you use them in a few minutes. Turn on the stove to medium.
- Add the lemon juice, cinnamon and sugar. Stir well. Next, add the corn starch. Turn the heat to medium-high and whisk continuously. The filling will begin to thicken.
- When the filling has thickened, add the cherries, but reserve about 8-10 to decorate. Let cool in the pot for at least 2 hours.
Simple Syrup
To make the simple syrup, which is best made in advance (the day before or a few hours), boil the water, sugar and Kirsch (or cherry juice) in a small pot. When it has come to the boil, remove off heat and set aside to cool.
Whipped cream
- Make sure your cream is cold. Pour it into the bowl, and start beating it. When it starts to firm up, pour in the sifted powdered sugar. Whip until soft peaks form.
To assemble the cake:
- Using one of your jars, cut out little cake rounds out of the huge cake layer. If your cake is too thick, cut out one cake round, and then carefully slice it in half. One cake round should be about 1 cm thick.
- Gently place it into your jar and push it down slightly. Brush the cake layer with the simple syrup.
- Next, put about 2 tablespoons of cream on top and smooth it out.
- Then add about 2 tablespoons of the sour cherry filling and also smooth it out. Place the next cake layer on top, and also brush with simple syrup.
- Put a small dollop of cream on top, smooth it out and sprinkle on some grated chocolate. Decorate with a single cherry. Place in the fridge to firm up for at least 2 hours (I wouldn’t prepare much longer than 10 hours in advance). Enjoy!
Notes
- The mini cakes are best eaten the day of putting the dessert together.
- Instead of Kirsch, you can of course use cherry juice – or leave it out altogether.
- My baking tray was a little bit too big, so I folded my parchment paper halfway. I didn’t cut off the excess – instead, I just made sure that it held that 90° angle: In order that this “wall” could actually stand, I put two heatproof glass bowls into the baking tray behind the “wall”, so the batter couldn’t go behing the wall.
